Showing posts with label Vegetables. Show all posts

2017-10-27

Red Kuri Squash and Sweet Potato Soup

It's fall, so you know, delicious fall soups are in order.  When I go grocery shopping, I have a general plan for my weekday meals.  A creamy fall squash soup was not on my mind at all until I saw this cute little organic red kuri squash.  At only $0.99 per pound (organic too!), this little squash was only $1.68 and makes an inexpensive starchy vegetable to base this lovely soup around.


I have been trying to move away from eating as many grains as I have been.  (Totally nothing wrong with whole grains!  But for me they often displace whole fruits and vegetables that pack more of a nutritional punch.) I feel like every fall my body says "all the rice and pasta!", so I have to consciously incorporate more starchy vegetables.  When I crack down and eat starchy vegetables like with sweet potatoes and this delicious red kuri squash, I am never disappointed.

Red Kuri Squash and Sweet Potato Soup 
Time: approx. 1 hour total
Servings: 4-6 servings
Ingredients:
    1 small to medium red kuri squash
    1 medium sweet potato, peeled and cubed (approximately 2 cups)
    1 large yellow onion, diced
    3 cloves garlic, minced
    2 cups vegetable broth
    1-16 oz can lite coconut milk (*see note below)
    1 Tbsp mild curry powder (**see note below)

Instructions:
1.)  Preheat the oven to 375 degrees F.  Wash the outside of the red kuri squash.  With a sharp chef's knife, carefully cut the quash in half.  Scoop out the seeds and stringy guts (these seeds can be saved and baked for a crunch snack).  Lay the squash halves face down on a baking sheet and place in preheated oven.  Bake for 30-40 minutes, until the outside of the squash halves are easily pierced with a fork.  Remove, turn over, and allow to cool.


2.)  While the squash halves are cooling, saute the onion and garlic in a medium saucepan (or in a pressure cooker), adding small amounts of vegetable broth to keep from sticking to the pan.  Once fragrant and soft add in the sweet potato and remaining vegetable broth.  Bring to a boil, reduce heat, and simmer until potatoes are easily pierced with a fork. (Cook on high pressure for 5 minutes, quick release.)

3.)  Once the squash is relatively cool, scoop out the soft flesh and discard the outer shell (compost!).  Add in the onion sweet potato soup, lite coconut milk, and curry powder.  Blend on medium-high until smooth and creamy.  Serve hot by itself or topped with some fresh cilantro or thai basil.
Amy's Notes:
*I used lite coconut milk in a can, but if you want to reduce your fat and calorie content further, you can use coconut milk from a carton, or any other low calorie unsweetened plant milk.

**For the curry powder, I used an African Curry blend that I had in my pantry, but any powdered curry will do.  If you'd like to use a curry paste, start with 1/2 tsp and add to taste as you are blending.  In case you're curious, my African Curry blend includes yellow mustard, curry leaves, fenugreek (holla at all the other breastfeeding mamas out there), onion, ginger, oriander, tumeric, cayenne, cumin, cilantro, garlic, green cardamom, black pepper, and cinnamon.


Health and Happiness,

Amy

2017-05-23

Curried Rainbow Vegetable Skillet

I'm not a huge fan of spring.  It is generally my least favorite season, at least until it is the middle of August hits and I'm cursing summer for being too damn hot.  In the Pacific Northwest, spring is generally a four month long tease that winter is over.  For us, it has been the rainiest season ever.  Literally, it was the rainiest winter and spring on record this last year.  Welcome to earth Ben, it rains a lot here!


The one reprieve we get in the spring is that some better quality and better priced produce starts showing up in the grocery store.  At my local grocery store I found asparagus for $1.89 per pound.  Chyah!  Last night I felt like having lighter dinner with lots of veggies, so in went my asparagus along with some other bright veggies.

I always have lentils cooked and frozen in the freezer to quickly thaw and add to meals like this, but feel free to leave out this ingredient or to use another cooked bean you like.  I also have a homemade (thanks mom) potato bag that cooks my potatoes in the microwave within minutes.  The cooking time for lentils and potato are therefore not included in my estimate below.

Curried Rainbow Vegetable Skillet
Time: 10 minute prep, 15 minute saute
Servings: 2 main servings or 4 side servings

Ingredients:
    Saute:
        1/2 red onion, diced
        1 small red bell pepper, diced
        1/2 bunch asparagus, bottom edges trimmed and 1/2 " sliced on the bias
    Pre-cooked ingredients to add:
        1 medium sweet potato, cooked, peeled, and cubed
        1 cup cooked brown lentils
    Quick Curry Sauce:
        3/4 cup plant-based milk, ideally unsweetened
        1 Tbsp almond butter, any nut/seed butter could work... maybe not PB, but you do you
        1 Tbsp curry powder, I used a Caribbean Curry spice mix
        salt, to taste

Instructions:
1.)  Prep all ingredients.  In a large skillet over medium-high heat dry saute the red onion, bell pepper, and asparagus, adding only small amounts of water as needed to prevent the vegetables from burning and sticking to the pan.
2.)  In a small bowl mix together the curry sauce ingredients.  Turn heat down to medium-low and add the sweet potato, lentils, and curry sauce.  Continue to cook and toss ingredients until the sauce has thickened and coated the vegetables.
3.)  Serve immediately.  I bet this would be amazing as a cold salad as well, maybe with extra sweet potato.  Bring it to a potluck.  Be the envy of your friends.


Amy's Notes:
Like I said above the recipe, I always have lentils prepped in the freezer, but if you don't and need to make this RIGHT NOW, here is a quick tutorial on how to cook lentils on the stovetop.  If you have an electric pressure cooker: 1 cup dried lentils, 2 cups water, high pressure for 6 minutes, natural pressure release, drain any excess water

  The sweet potatoes I used are the ones with a white/cream colored flesh, not orange like a yam.   I just throw mine into a potato bag and microwave it for 8 minutes.  My mom made me one for Christmas from this pattern I believe.  I know some people have a problem with microwaving their food, but in my mind, I think it is better to be able to get a cooked potato in my mouth relatively quickly than to turn to snacking on other unhealthy items (ahem... chips and crackers are my weakness).  Alternatively, you can bake ahead of time or steam your potato in a pressure cooker.

I found that this was plenty hearty enough for a main meal, but if you'd like you can double the curry sauce and serve over brown rice or your favorite whole grain.  Topping with cilantro would probably be pretty tasty too.  I just didn't have any on hand.


Health and Happiness,

Amy

Pinterest Reference:


2017-02-22

Smokey Pecan Brussels Sprouts from The Ultimate Vegan Cookbook for your InstantPot

Have you guys been seeing InstantPot in the news lately?  They have become wildly popular with a fairly basic marketing scheme: word-of-mouth.  For those of you who have already joined the pressure cooker party, you are going to love this.  For those who need an extra push to get one, this new cookbook by Kathy Hester is it!

It is called The Ultimate Vegan Cookbook for your Instant Pot and it has quickly become my new favorite cookbook.  She has written it with particular instructions to make it easy and simple to use with an Instant Pot electric pressure cooker (of any size and model), but it could easily be used for other brands of electric pressure cookers as well as stovetop pressure cookers.


What sets Kathy's book apart from other pressure cooker cookbooks I have is that every single recipe has a picture.  So what?  Well, I love a cookbook with gorgeous pictures for the same reason I love reading recipe blogs.  You get to live the recipe before you make it.  On any normal day when I'm starting to get hungry for lunch, I wouldn't normally pick to make a recipe called "Snowy Day Potato Cabbage Soup" (page 130 in the cookbook), but when you see this cozy cup of soup sprinkled with parsley, you think "yes, that could totally be me snuggled under a blanket by the fire eating this soup."  This recipe is great, by the way.  I've already made it twice already.

The sections of the book are as follows as well as the recipes I've tried from each (I've highlighted my favorites in pink.  These will go into my regular rotation for sure!):
  • Five Recipes to Start You Out
    • The Best Not-Refried Black Beans
  • Quick and Easy Homemade Staples to Save You Money
    • Plain Applesauce
    • DIY Andouille Seitan Sausage
    • Tequila-Lime Jalapeno Really Hot Sauce
    • Make Your Own Jalapeno Powder
  • Bean and Lentil Recipes that Cook in Half the Time
    • Thai Red Curry Chickpea Spread
  • Fun and Delicious Ways to Add in More Whole Grains
    • Perfect Kamult (and Other Long-Cooking Grains) - used on whole oats
  • Eat Your Vegetables: Easy and Elegant Plant-Based Fare
    • Smoke Pecan Brussels Sprouts (featured below)
    • Healthy Cream of Asparagus Soup
    • Snowy Day Potato Cabbage Soup
    • Vegan Cauliflower Queso
  • Fast and Comforting One-Pot Meals
    • Winter One-Pot Lentils and Rice
  • Cook it All at the Same Time: Layered Meals with Sides
    • One-Pot Burrito Bowls
  • Decadent and Healthy Desserts
    • Vanilla Spice Tea Concentrate
I've had this cookbook in my hands for maybe two or three weeks, and you can see I have gone to town!  My favorite recipe (that would be worth it to get the cookbook on its own) is the Vanilla Spice Tea Concentrate.  It's made by pressure cooking water with spices, steaping in tea afterwards, and then you have a concentrated chai-like tea to heat (or have over ice) with an equal amount of plant milk (sweetened if you like).  

My parents, who are also plant-based, came to visit to see me (Who am I kidding?  They are totally here to see my little potato.  And who could blame them?) last weekend.  While on the drive across the state they usually stop for a little treat at Starbucks, most often for a chai tea latte.  I tested out the recipe the day before they got here and holy smokes!  Waaaaayyyy better than Starbucks!  I made it for them the next morning with our breakfast and my mom immediately got onto Amazon to order her own copy of the cookbook along with a bulk order of the spices needed to make the tea.

To make a batch of the tea, the ingredients cost me around $2 and it made 8 servings.  That's 8 chai lattes I wouldn't buy from a coffee stand for $5 each.  With the cost of the plant milk added in, each latte I make at home is well under $1 each.  Plus, I know exactly what goes into my tea and can control if I want it with more or less sweetener each time.

But here I am rambling on about a tea when you came here to see what these Smokey Pecan Brussels Sprouts are all about.  I've made this recipe twice... and ate the whole pot in one sitting... twice.  The recipe says it is for 4 side servings, but as a Nutritarian, I can eat LOTS of veggies, so I would say it is closer to 2 sides or 1 meal size serving.  The sweet of the maple syrup with the smokey bitter of the Brussels sprouts pair perfectly.  This would be an ideal recipe for a family holiday dinner side.  Or to make randomly and eat shamelessly all to yourself.


Smokey Pecan Brussels Sprouts
By Kathy Hester, The Ultimate Vegan Cookbook for Your Instant Pot.
Recipe attributes: gluten-free, soy-free, no added oil
Kathy's Recipe introduction:  This recipe will turn your sprout haters into sprout devourers!  I used a variation of this to get Cheryl to try sprouts for the first time.  The sweet and smokey flavor really make these Brussels sprouts addictive.
Time: <5 minute prep, 2 minutes High Pressure, Quick Release, 2-5 minute saute
Servings: 4 side dish servings (1 nutritarian serving, cus we like our veggies!)

Ingredients:
    Pressure Cooker Ingredients:
        2 cups small baby Brussels Sprouts, as close to the same size as possible
        1/4 cup water
        1/2 tsp liquid smoke
    Saute Ingredients:
        1/4 cup chopped pecans
        2 Tbsp maple syrup
        Salt, to taste

Instructions:
1.)  For the pressure cooker, add the Brussels sprouts, water, and liquid smoke to your Instant Pot and mix well.  Put the lid on and close the pressure valve.  Cook on high pressure for 2 minutes.  (Note: If you have very large Brussels sprouts, you may need to double the cooking time.)
2.)  Once the cooking time is up, carefully move the pressure release valve to release the pressure manually.
3.)  For the saute, switch to the saute function and add the pecans and maple syrup and reduce the liquid as you finish cooking the sprouts.  Remove from the heat once tender and add salt to taste.

Per Serving: Calories 96.4, protein 2.2 g, total fat 5.5 g, carbohydrates 11.7 g, sodium 11.9 mg, fiber 2.4 g

Notes:
Brussels sprouts vary greatly in size.  Do your best to pick ones close in size or cut the largest ones in half.  You can use frozen sprouts in this recipe, just up the cooking time by a minute or two depending on their size.


Convinced you need this cookbook in your life?  Find it here on Amazon for purchase.


Health and Happiness,

Amy


2016-01-26

COOKBOOK GIVEAWAY! Vegan Under Pressure: Sassy Sesame Tofu

[Editor's note: Please note that the giveaway has ended and the winner is announced here.  Thank you to all who entered!]

When I first got my InstantPot, Jill Nussinow's cookbook, The New Fast Food quickly became a favorite of mine.  The time tables were spot on, and her recipes were flavorful and very approachable for someone new to pressure cooking.  Many of Jill's (aka The Veggie Queen's) recipes from her first pressure cooking cookbook have filled our kitchen for the last year, so I was ecstatic to get my hands on her second, Vegan Under Pressure.


Over the past few weeks, I've tried a dozen or so recipes from Vegan Under Pressure, and I can already tell it is a big winner!  Not only does it have tons of new recipes, but it is an EXCELLENT source for those new to pressure cooking.  The first two chapters introduce the reader to their pressure cooker, and then goes over pressure cooker basics.  It includes info for jiggle-top pressure cookers, stovetop pressure cookers, and electric pressure cookers.  Here is the index of how all of the chapters are organized:

One - Introduction to Pressure Cooking
Two - Pressure Cooking Basics
Three - Spice Blends and Other Seasoning
Four - Grains
Five - Beans
Six - Vegetables
Seven - Soups
Eight - Main Courses
Nine - Burgers, Patties, and Savory Cakes
Ten - Toppers: Sauces, Fillings, and More
Eleven - Appetizers
Twelve - Desserts

One of my favorite features of the new cookbook is the layout of the recipe pages.  On the right (or left for reverse side) edge of the page there is a summary of the cooking time and pressure releases required, followed by the ingredients.  The main page of each recipe then includes a description, how many servings it will produce, and then the instructions.


Another thing I love about this cookbook, and really all of Jill's recipes is that she allows room for improvising.  Like in this recipe, maybe you don't have 2 cups of sugar snap peas on hand, so use broccoli instead!  All of her recipes can be great starting points for creating dishes out of we have on hand and what each person's particular tastes are.

Moving on to the recipe I'm about to feature, which happens to be the one on the cover of the cookbook, I know some of you shy away from tofu for one reason or another.  In this recipe, just make sure to get extra firm tofu and drain and pat it dry.  If you are really against tofu, try switching it out for 2-3 cups of cooked beans such as chickpeas or even edamame.  I've already made this recipe twice and love it, so trust me, you don't want to miss out on these flavors.

Sassy Sesame Tofu 
with Sweet Potato, Carrots, and Sugar Snap Peas
Time: 10 minute prep, 3 minutes high pressure, quick release, 1 minute high pressure, quick release
Servings: 4


Ingredients:
    2 tsp toasted sesame oil (I left this out, but it would add flavor without too many calories)
    1 medium yellow, white, or sweet onion, sliced from top to bottom to equal about 2 cups
    1 carrot, peeled and cut on the diagonal into 1/2-inch pieces
    1 cup diced peeled sweet potato
    3 cloves garlic, minced
    2 Tbsp sesame seeds (1 Tbsp reserved)
    1 pound extra firm tofu, cut into 1-inch cubes
    1-2 Tbsp tamari (or soy sauce)
    1 Tbsp rice vinegar
    1/3 cup vegetable stock
------------------------------
    2 cups sugar snap peas or snow peas, cut in half
    2 Tbsp Sweet and Spicy Red Pepper Sauce or sriracha
    2 Tbsp tahini, optional, for a richer dish
    2 Tbsp chopped green onions, for garnish

Instructions:
Prep all ingredients before beginning.

1.)  Heat a stovetop pressure cooker over medium heat or set an electric pressure cooker to sauté; add the sesame oil if using.  Add the onion, carrot, and sweet potato and sauté for 2 minutes.  Add the garlic and 1 tablespoon of the sesame seeds and sauté for mother minute.  Add the tofu, tamari, vinegar, and stock.

2.)  Lock the lid on the cooker.  Bring to high pressure and cook for 3 minutes (set your electric pressure cooker to cook for 3 minutes on high pressure).  Quick release the pressure.  Carefully remove the lid, tilting away from you.

3.)  Add the peas and lock the lid back on.  Bring to low pressure; cook for 1 minute.  (If you do not have a low pressure option, lock the lid on and let sit for 2 to 3 minutes.)  Quick release the pressure. Remove the lid, carefully tilting away from you.

4.)  Stir in the pepper sauce and tahini, if using.  Garnish with the remaining 1 tablespoon sesame seeds and the chopped green onions and serve.

Variations:  Use broccoli florets or 1-inch pieces of green or wax beans instead of the peas.  Cook at low pressure for 2 minutes with a quick release.


Amy's Notes:

I've made this recipe twice and loved it both times.  I've tried it with the added tahini and without it, and I actually prefer it without the tahini.  The first time I made it, my sweet potatoes cooked a bit too much and ended up mushing into the sauce (which I really liked).  The second time my sweet potatoes stayed together a bit better.  Jill makes note in her pressure cooker introduction that her recipes can have a bit of different results depending on the freshness of your ingredients.  My first sweet potato must have been fresher than the second!  The same can be true for dried beans.

In the end, all I can say is thank you, Jill, for another amazing cookbook to add to our arsenals.  Your healthful and fast recipes will grace my pressure cooker and our table for years and years to come!
Find Jill's website here and sign up for her monthly newsletters.  Within her newsletters she updates fans of where she is, what she is doing, AND features a few recipes, many of which are for the pressure cooker.

Now, for you lovely readers who would like to enter in for my GIVEAWAY of Vegan Under Pressure,  please see below.  The giveaway will run from today until midnight on February 1st and is limited to those in the US and Canada for shipping reasons.  Now, this is my first time using this widget for a giveaway, so cross your fingers that everything works!  I will contact the winner of the random drawing by next Friday, February 5th.  Good luck to all!

a Rafflecopter giveaway
Health and Happiness,

Amy

2016-01-13

Beet, Mushroom, and Onion Salad

It took me quite a while to warm up to beets, even after I became a Nutritarian.  The first beets I remember trying were in a can.  Several weeks into being a new Nutritarian, I was looking for ways to bring some interesting flavors to my daily salads.  I threw the can of crinkle cut beets into my cart and popped them open to try once I got home.

Terrible.  They tasted almost metallic (probably from the can now that I think about it).  I forced a few more slices down before I determined beets just weren't going to be part of my salad thing.  At least not at the time, anyway.

A few years later I saw some golden beets at a farmers' market and decided to give it a try again, this time with the fresh stuff.  I ended up liking those beets both roasted and steamed.  After that, I gave red beets a try again and decided my first experience was not telling enough of this roots' wonderful culinary (and health) virtues.

I've heard some people say that beets can "taste like dirt", and it is true that they have a more earthy taste, but then again so do a lot of different wines, some cheeses, as well as very common kitchen items like mushrooms and lentils.  Earthy is a fun flavor to play with, especially by adding ingredients with acidic, nutty, and sweet notes.

Beet, Mushroom, and Onion Salad
Time: 20 minutes
Servings: 4-6 servings

Ingredients:
        1 1/2 - 2 lbs mixed gold and red beets (about two bunches), tops and roots removed, peeled and cut in half or quarters
        1-2 cups sliced cremini mushrooms
        1/2 red onion, sliced
        1/4 cup balsamic vinegar
        1 Tbsp soy sauce
        1 Tbsp syrup sweetener (such as date syrup, honey, maple syrup, etc.)
        1 Tbsp sesame seeds

To serve: fresh dark greens, nuts

Instructions:
1.)  Cut the tops and root tips off of the beets.  Wash and peel.  Cut in half or quarters if the beets are large.  Place in a steamer basket and steam on the stove top for about 15 minutes, until the beets are fork tender.  Remove from heat and dunk the steamer basket into an ice bath to stop the cooking and cool the beets down.
*** If you have a pressure cooker, you can steam your beets that much faster.  Check your pressure cooker manual charts for the correct directions and time needed.***

2.)  Slice the cooked beets into 1/4-1/2 inch slices.  In a large bowl combine the sliced beets, mushrooms, red onion, and sesame seeds.
3.)  In a small bowl, whisk together the balsamic vinegar, soy sauce, and sweetener.  Pour the liquid over the beet mixture and stir to combine well.  Let marinade in the fridge for at least 1 hour and up to 4 days.
4.)  Serve chilled or at room temperature on top of fresh spinach or kale (bonus points if you use the beet top greens!).  Sprinkle with chopped almonds, pecans, or walnuts for an extra treat.

Amy's Notes:
For those who haven't tried beets before, or if it has been a while, red beets have quite a bit of pigment in them and their juices that can stain counter tops, cutting boards, sinks, hands, and ahem... personal waste removal.  Just take some precautions by wearing gloves and using an old cutting board, and cleaning up splashes on counters and sinks with a damp cloth as they happen.  Also don't be alarmed when your poo comes out red-ish.  You are not dying, nor are you in need of medical assistance.  Keep calm and know that you got lots of fiber, vitamins, and nutrients!


Health and Happiness,

Amy

2014-09-18

Indian-Spiced Sauteed Vegetables

I hope everyone's week is going well.  I'm excited to bring you a new recipe today.  As I mentioned in my post earlier this week, I have already made this dish twice this week.  Once when my parents visited last weekend, and again on Monday to enjoy with my lunches for the week.

This recipe is VERY versatile!  It will work with just about any veggies you have on hand.  It would even taste great with some cooked potatoes added in.  I have been having it with some cooked basamati brown rice and homemade Indian saag with mung beans, which I made based on Wendy's recipe at Healthy Girl's Kitchen called Vegan Indian Saag (Spinach) Tofu.  Another way I enjoyed it this week was with brown rice, some chickpeas, and topped with some siracha sauce.  Like I said, very versatile!

The point of this recipe for me this week was to have some cooked (mostly green) veggies ready to eat, rather than digging out my pots and pans every evening.  I actually tasted this cold out of the fridge, and it was super yummy!

Indian-Spiced Sauteed Vegetables
Time: 15 minutes
Servings: 2-4 servings

Ingredients:
    Vegetables: (about 6 cups total)
        1/2 head green cabbage, shredded
        1 large yellow onion, chopped
        1 medium zucchini, chopped
        1 cup mushrooms, sliced
    Spices:
        2 cloves garlic, minced
        1 tsp ginger paste (or 1/2 tsp minced fresh ginger)
        1 tsp cumin
        1 tsp coriander
        1/2 tsp turmeric
        1/4 tsp cayenne pepper, more to taste
        1/4 tsp cinnamon
        Fresh herbs
 

Instructions:
1.)  In a large frying pan over medium-high heat, saute the garlic and ginger paste with a little water, as needed.  Once fragrant and lightly browned, add in all of the vegetables.
2.)  Water saute the vegetables for 5-8 minutes, until soft and tender.
3.)  Sprinkle on the remaining spices and stir to incorporate.
4.)  Serve hot by itself, on a baked potato, with brown rice, over steamed spinach, with chickpeas, etc.  Or be crazy and eat it cold out of the fridge!

Amy's Notes:

I forgot to mention, fresh herbs mix wonderfully into this dish.  I happened to have fresh basil on hand (thank you mom's garden!), so I roughly chopped up about 1/4 cup and added it to the veggies at the end of cooking.  Other fresh herbs that might go well besides basil are cilantro and mint... separately, of course! ;)

I absolutely love the color that the turmeric colors the veggies.  The spices hold up wonderfully on their own, and I have found that the veggies go well as a side as well as on top of some grains and beans.

This is a great side dish to make if you are having a homemade Indian dish for dinner.  Most main Indian dishes take some time and effort to make, so the fact that this vegetable saute can be chopped and cooked within 15 minutes is important!


Health and Happiness,

Amy

2014-01-08

Veggie Loaded Stir Fry


Do you ever have those days that you know you didn't eat the healthiest of lunches?  I had one of those days yesterday.  At my work, to celebrate the Mountain West Region reaching its profit goals, we had a pizza party.  Luckily, I was the one tasked to order all of the pizzas, so I was able to put in an order for a thin crust, all veggie, and light cheese pizza.  Although this was a better choice than to have a thick, hand-tossed pizza loaded with cheese and meat, it still wasn't as plant-strong as I normally have for lunch.  To make up for the white flour and cheese in my gut last night, I made myself this Veggie-Loaded Stir Fry.
***Remember to Pin any images on this post that you would like to share on Pinterest!  Just hover over an image and the "Pin It" button will appear in the top left corner of the image***

Serves: 2
Time: 20-30 minutes

Ingredients:
  • approximately 1.5 to 2 lbs of raw vegetables (I used yellow onion, celery, carrots, green beans, bell pepper, broccoli, then tomatoes and green onion for topping)
  • Sauce:  You can use any sauce that you prefer, but I happen to LOVE peanut sauces
    • 1/4 cup peanut butter
    • 1/4 cup water
    • 2 Tbsp low sodium soy sauce (more to taste)
    • 2 Tbsp white rice vinegar
    • 1 Tbsp brown rice syrup (or preferred sweetener)
    • 1 tsp red pepper flakes (more to taste)
Instructions:
  1. Wash and cut all of your veggies (I like to cut my celery and carrots at a diagonal, then thin slices for my pepper and onion)
  2. In a large skillet, heat several tablespoons of water over medium-high heat until a rapid boil.  Add in the veggies and saute, adding more water as needed to keep the veggies from burning.
  3. In a smaller bowl to the side, combine the ingredients for your chosen sauce.  Allow the veggies to cook until tender and add the sauce.  Heat until the sauce is bubbling and turn down the temperature to a simmer.  Allow any excess liquid to boil off.
  4. Add in your choice of bean if you prefer at this time and heat for a few more minutes (I added some leftover black eyed peas.)
  5. Serve by itself, or on top of brown rice, quinoa, whole wheat noodles, etc.

Amy's Notes:
I ate my stir fry by itself, but as I said above, I added in some extra black eyed peas, then topped off with fresh tomatoes and green onions.  This is a great way to still enjoy a warm dish without a grain (that is not another soup!).  For those of you doing the first 6 weeks of ETL, when it is recommended to eat 1 lb of cooked vegetables daily, this recipe will help you get there!


What is your favorite veggie to have in a stir fry?

2013-02-20

Peanutty Vegetable Stir Fry

MmmMmmmMMMM!  Do I love stir fries!  Not only are they quick and easy to make, they use relatively inexpensive ingredients, are a breeze to clean up after, and are the perfect leftovers!  Stir-fries can also be quite versatile depending on what veggies, sauces, and spices you have on hand.  Tonight I made a stir fry from some veggies I was needing to use up, some rice I cooked this weekend, and a flavor I was craving, peanut butter!


Ingredients:

  • mixed stir fry veggies
    • 1 bag frozen veggies, or
    • 3 cups fresh veggies, chopped
  • 1 cup chopped dark greens (kale, collards, spinach)
  • 3-4 cups cooked brown rice
  • Amy's Spicy Peanut Sauce
    • 1/2 cup creamy natural peanut butter
    • 1/2 cup water
    • 1/4 cup rice vinegar
    • 1/4 cup low sodium soy sauce
    • 1 tsp red pepper flakes
    • 1/2 tsp minced garlic
    • 1/4 tsp minced ginger
    • 1/4 tsp wasabi powder (optional)
  • stir fry toppings (just some ideas)
    • chopped peanuts
    • chopped green onion
    • cilantro
    • basil
    • sprouts
    • lime juice
Directions:

  1. Prepare all stir fry veggies.  In a large non-stick skillet, water saute the vegetables until tender.
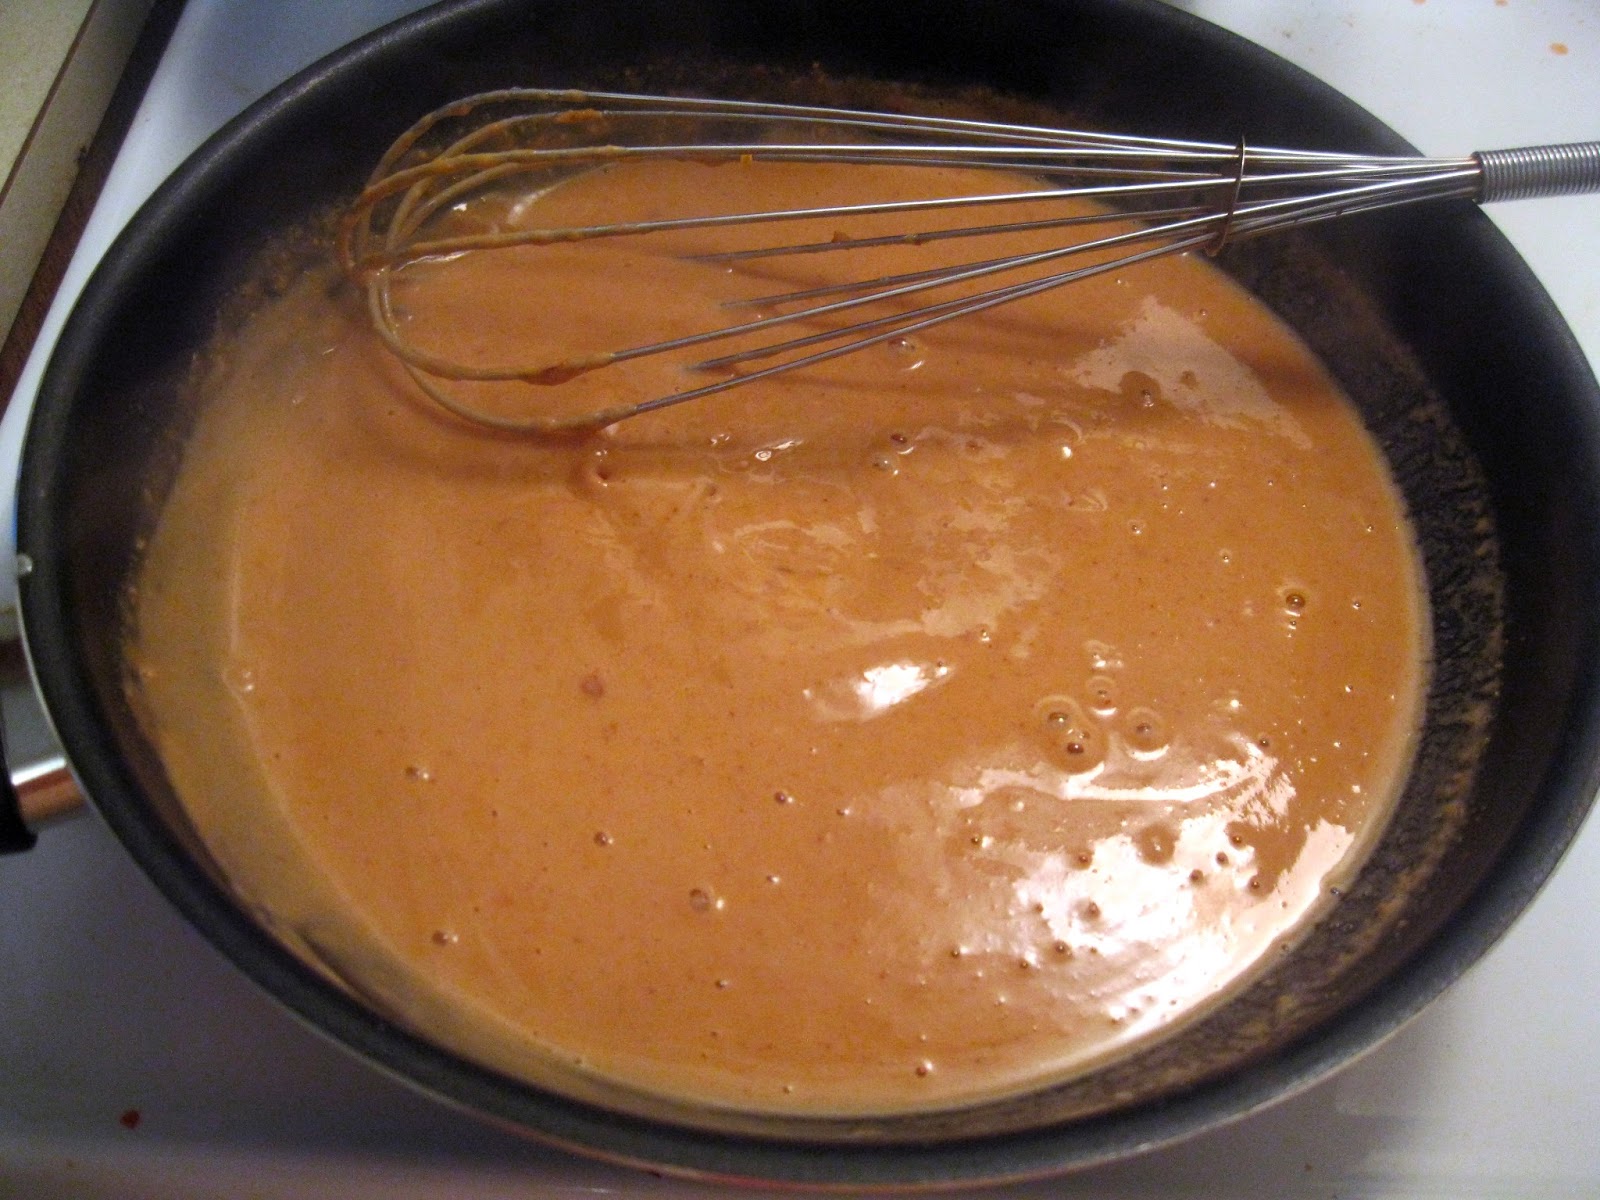
  2. While the veggies are cooking, in a smaller skillet, whisk together the Spicy Peanut Sauce ingredients over medium heat until it starts to bubble and the sauce thickens.  Add more water if the sauce becomes too thick.
  3. Once veggies have finished cooking, add the cooked rice and prepared peanut sauce to it.  Mix well, then add in the chopped dark greens.
  4. Cook over medium heat until rice is heated through and the dark greens have lightly wilted.
  5. Add more soy sauce and red pepper flakes to taste.
  6. Serve hot with any of the suggested toppings.
Amy's notes:
  • This is a very versatile stir fry.  Use whatever veggies you have on hand, or for an even faster dinner, use a frozen stir fry mix.  I used fresh red onion, green bell pepper, mushrooms, and broccoli in mine.
  • The spicy peanut sauce is one of my favorites and I make it all the time.
  • To top my stir fry off, I added chopped green onion and cilantro.  It added the perfect flavor punch to an already yummy dish!

2013-01-28

Mixed Potatoes with Kale

Hello!  I'm pleased to announce that I have come back to blogging after my nearly 4 month hiatus!  Over the last couple of months Kevin and I have been getting settled into married life and the new habits and schedules that ensue.  While I was gone I've seem to have a constant inner-battle about what foods I should be eating.  One week I would be spot-on Nutritarian with no added meats, dairy, sugars, or oils... then the next it was Thanksgiving dinner with temptations, or after Christmas with tons of goodies brought home.

All I can say is making the daily decision of what to put in your body is HARD!  It's hard for me to listen to my voice of reason (my Nutritarian voice), and silence my food-addict's taunts.  I think a good first step is to admit it... right?  Well, new readers and old, I hope you continue to follow me on my journey of trying to figure out what works for me, struggling with what doesn't... oh, and all of the awesome recipes that are produced in between!

Since Kevin and I got married last September, we have finally worked out a food and shopping budget to fit our recently-graduated-newly-wed-still-want-to-have-fun lives.  As a Nutritarian, my staples have become the bulk food section with dried grains and beans, as well as frozen and fresh vegetables when I find them on sale.  Some of Kevin and my favorite foods are potatoes (oh my gosh, we can actually agree on something food-wise!).  This weekend I decided to make a potato-based lunch for the both of us.  Kevin requested mashed potatoes, and while those were cooking, I came up with something a bit more nutritious for me.  Hope you enjoy :)


Ingredients:

  • 2 lbs. mixed potatoes, washed and cubed (peeled if desired)
  • 4 cups of chopped kale
  • 1/2 red onion finely chopped
  • 1 tsp crushed garlic
  • 1 tsp dried basil
  • 1 tsp dried parsley
  • 1/4 tsp celery seed


Directions:
  1. Prepare all ingredients.
  2. In a large skillet, bring a couple of tablespoons to a boil and add the onion and garlic.  Water saute these until fragerent, but not until the onion is translusent.
  3. Add all of the cubed potatoes and about 1/2 cup of water.  Cover and let it simmer/steam on medium heat, adding more water as necessary.
  4. Once the potatoes have softened so that you can fork them, stir in the dried basil, dried parsley, and celery seed.
  5. Next, place all of the kale on top of the potatoes and cover to steam.  Make sure that there is still a small amount of liquid at the bottom of the pan so that the potatoes don't stick and the kale has steaming water.
  6. After about 3 minutes, check to see if the kale has wilted to your liking, and remove the skillet from the stovetop.  Allow to cool with the cover off.
  7. Serve as a side dish for the family, or a main dish for up to 4 people.

Amy's Notes
  • Feel free to use whatever potatoes you like.  I used two russets, a few red potatoes, and one yam/sweet potato.
  • While cooking make sure that all varieties of potatoes are soft enough to fork before you move on to the next step.  I know my yam took a bit longer to cook than the rest of the potatoes.
  • Please customize the spices to your liking.  This weekend I felt like basil, parsley and celery seed, but I bet this would be great with cumin, chili, cajun, or curry seasonings!
  • I served mine topped off with a homemade "Cheeze" sauce.  I'm still perfecting this recipe, so I won't share it at this time, but there are many recipes you can find online that are anywhere from nut or tofu based, to bean or non-dairy milk based.
  • Other great toppings for this dish could be salsa, tabasco sauce, vegan sour cream, or vegan shredded cheese.

What voices do you hear in your head when you are making food decisions?  Who often wins, and why?

2012-06-14

Roasted Brussels Sprouts

I've been getting a bunch of emails from readers asking questions about the nutritarian lifestyle, and I am so happy to help them out as much as I can.  I find that I learn and remember information best when I teach others, so thank you to those who have been writing to me for giving me that opportunity.  One of my readers had a recipe request, and of course, I was thrilled and put it on my to-cook list.  She requested a recipe for basic roasted brussels sprouts that were not drowning in oil, like I have often seen.  This recipe has a small amount of oil in it, but it can easily be omitted for more sprayed-on water.  Hope you enjoy :)


  • brussels sprouts, stem chopped off, and cut in halves or fourths
  • spray bottle or misto with water and a small amount of oil mixed
  • spices of your choice


Directions:  
  1. Pre-heat oven to 400 degrees F.
  2. Cut brussels sprouts and place them in a baking pan.
  3. Spray to coat them with water-oil mixture.
  4. Sprinkle on desired spices and stir.
  5. Bake for 30-40 minutes, stirring brussels sprouts halfway through.
  6. The brussels sprouts are done roasting when they begin to brown and are tender at their core.
Amy's Notes:  I used a misto with a part water part oil mixture, but you can easily omit all oil and just coat with water.  If you just use water, make sure to re-spray as it's baking and the moisture has evaporated.  These can also be roasted without any spices on them in case you are not sure how you are going to eat them afterwards.  They are excellent straight out of the oven, or out of the fridge cold with a tahini lemony dressing.  
I've been thinking of some other dishes to have brussels sprouts on and the thought of a pita pizza came to mind with mushrooms and red onion for the other toppings... Does that sound very good or am I just talkin' crazy?

2012-05-21

Potatoes with Fresh Baby Greens

I hope everyone is having a good start to their week.  I'm in the summer mode where I am loosing track of which day of the week it is since I have nowhere I need to be.  Believe me, the job search is in full throttle!  Wish me luck in finding something soon!

For now, my days have consisted of making healthier food for myself, job searching, and blogging.  One fun part about being home right now is getting to watch my parent's garden start to grow like crazy!  They made a modest-sized raised-bed garden in our backyard and have planted it with green leaf lettuce, kale, spinach, onions, green onions, basil, carrots, beets, and radishes.  So far, everything is above ground, but the beets and radishes seem to be growing the fastest.  The other day, I helped by pulling some of the beets and radishes so that they don't crowd out each other and grow a bit better.  My mom ended up Googling that beet and radish greens are edible, so I thought I should try to make something with it.

Potatoes with Fresh Baby Greens
Ingredients:

  • 4 red potatoes, washed and cubed
  • 1-2 cups fresh baby greens, washed
  • 1/2 onion, finely chopped
  • 2 cloves garlic, pressed or minced
  • several mushrooms, sliced
  • 2 Tbsp fresh basil, finely chopped
  • fresh ground pepper 


Directions:  In a large skillet on medium heat, water saute the garlic and union until onion is tender.  Add the potatoes and cover, adding water as needed to not allow ingredients to burn, and stirring occasionally. "Steam" the potatoes for several minutes, until you are able to just pierce with a fork.  Add the mushrooms and stir until they are lightly cooked.  Add in basil, pepper, and any other spices you desire.  Finally, place the greens on top and cover with a lid once more for 2 minutes.  Once greens are lightly "steamed", stir them into the dish and serve hot.

Amy's Notes:  This was a really satisfying recipe that came together quickly.  It could easily be a great breakfast food (with a bit of hot sauce).  Because the greens came from our garden, the radishes had small red roots that we minced up and placed on top (that you can see in the serving photos), obviously this is not needed, but gave the dish an extra spice to it.  It would be equivalent to one normal sized radish minced.  If you don't have baby garden greens, spinach, arugula, or kale would work great to replace the greens.


What is your favorite type of fresh produce to get from your garden?  What vegetables do you want to have in your fantasy garden?